Sunday, May 29, 2011

Memorial Day Picnic - Grilled Caribbean Chicken with Mango Avocado Spinach Salad

Featured Ingredient: Crushed Pineapple

Since the weather seemed to change literally overnight from damp, dreary and chilly to something more summer like, my family and I figured we would break in the picnic table last night and resurrect the grill.  This got me thinking about what I was going to make for Monday's celebration.

As you are perusing recipes for your Memorial Day festivities or even another summer party, I would like to offer this for your consideration. While I only cooked for a small intimate crowd. The below serves at least 8.

This is by far my favorite chicken recipe... ever. It was my favorite recipe long before Uncanny Goodness. Now that a warm spring is upon us, I wanted to share it with you.  It's from the June 2000 issue of Working Mother, when I was 8 months pregnant with a 3 year old in tow.  Searching for an easy to prepare recipe yet flavored for an adult palate, I came across this article. Something about the sweet, citrus and spicy notes infused by the marinade married with the char of an open flame is nothing short of magical. It pairs well with Mango Avocado Spinach salad (recipe follows) and fragrant white basmati rice.

You can use any part of the chicken for this.  Last night we used breasts.  I think the best choice is boneless thighs.  They cook quicker than bone-in chicken parts and are meatier and juicier than breasts, that dry out more easily.  I used to have a grill that used to char everything way before it was cooked.  So I would sear the outside of the chicken and infuse the outdoor grill flavor and finish them in the oven at 375F.  This is another strategy that works. The grill is key however for that smoky punch.

If the flavor profile of the chicken is far too sophistacated for your child's or chldren's taste, create these for them with some hamburger and save more chicken for you!
Hamburger Faces


Grilled Caribbean Chicken - Serves 8

8 pieces bone-in or boneless chicken pieces (drums, thighs, or whole breast halves)

Marinade:
1 can 8oz crushed pineapple (2 are pictured but you only need 1)
4 tbsp lime juice
4 tbsp dijon mustard
4 tbsp vegetable oil
3 large cloves garlic
1 tbsp plus 1 tsp light brown sugar
1/2 tsp dried thyme
2 tsp ground allspice
2 tsp ground cloves
1 tsp salt
1/2 tsp black pepper.

Rinse chicken and pat dry. 

Squeeze juice from pineapple can into a liquid measure and add enough pineapple to equal a 1/2 cup.
In a large resealable bag add the rest of the marinade ingredients.  Add chicken and squeeze out as much air as possible out of the bag.  Marinate for at least 1 hour or up to 1 day.

Remove chicken from marinade and shake off excess.  Throw marinade away!

Preheat grill. Oil rack and place over medium heat. Grill chicken skin side down first to sear.  When grill marks are achieved turn chicken.  Cook depending on size of meat until a meat thermometer registers at 175 for thighs and 165 for boneless breasts.  Remove from heat to a plate and let rest a few minutes under tin foil. Again, if you are working with large pieces of  bone-in chicken like whole chicken legs, you can sear them and finish them in the oven.

Grilled Caribbean Chicken
An even more simply accompaniment is the Mango Avocado Spinach Salad.  Basically that is all the ingredients except for a few splashes of balsamic vinegar dressing.  The bright note of the mango and creaminess of the avocado is a perfect match with the seasoned chicken.

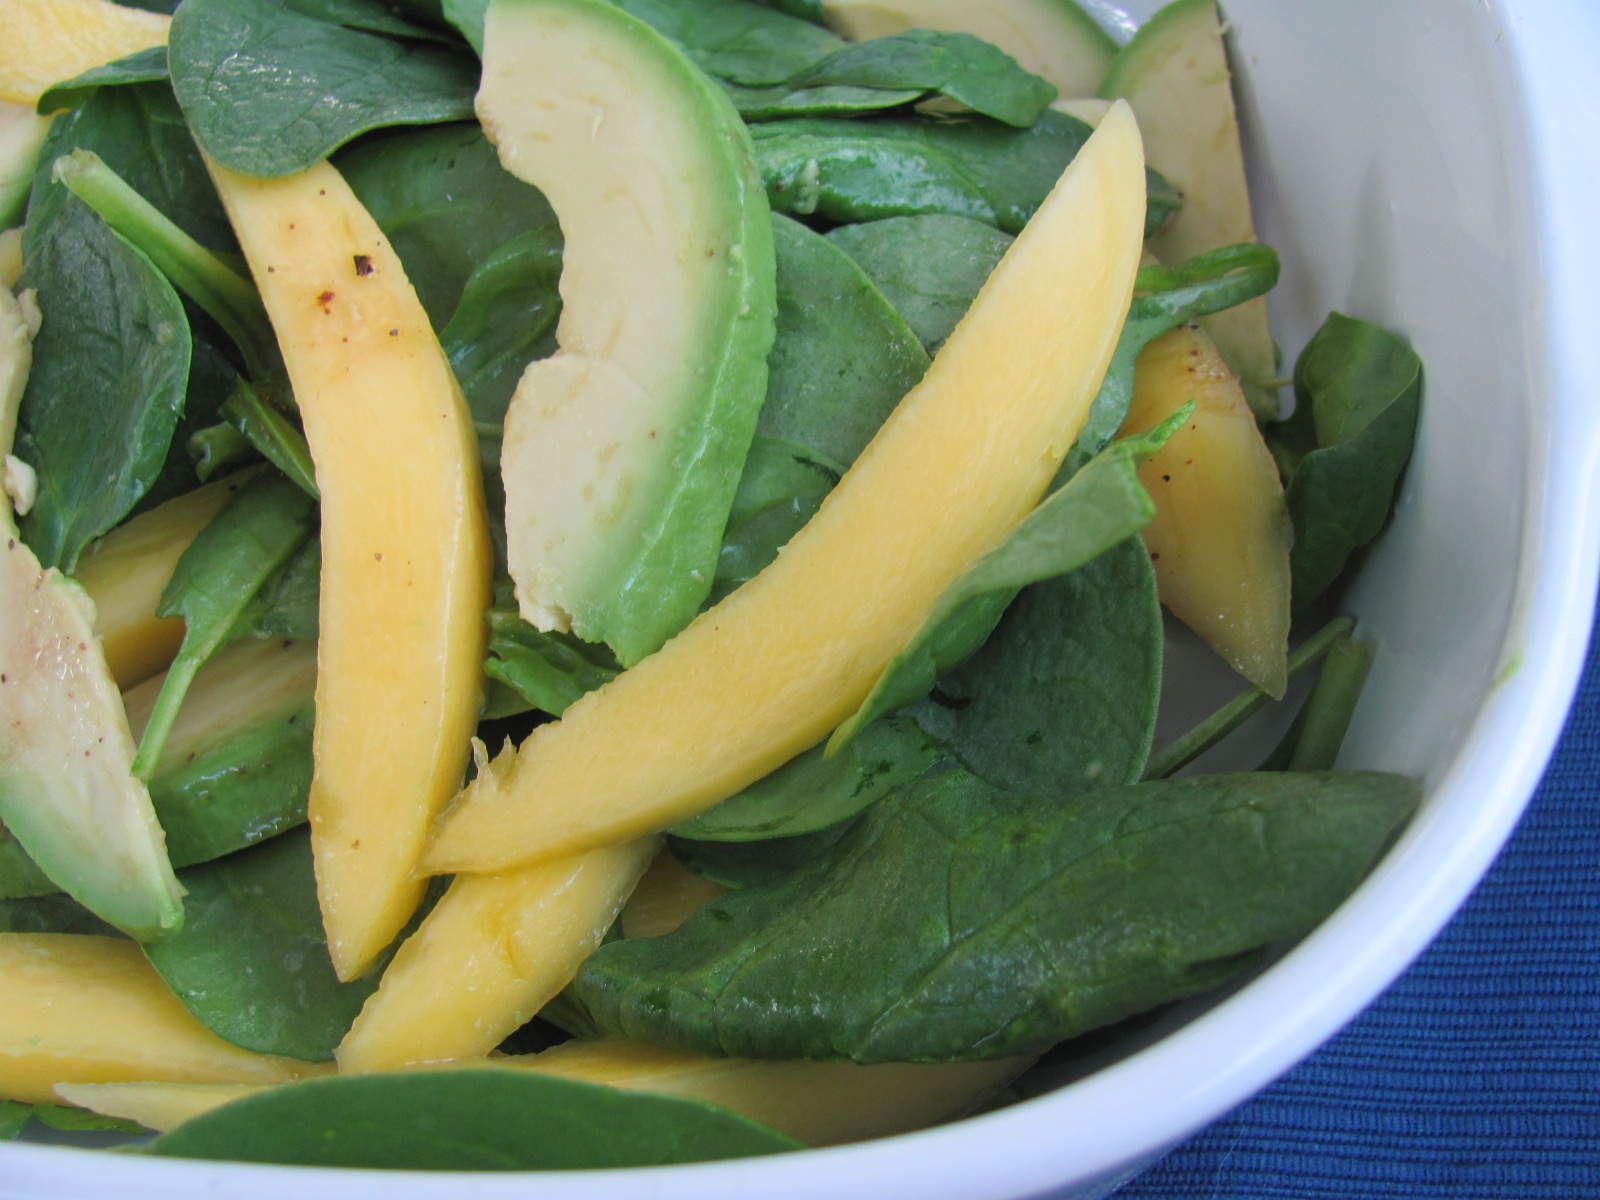
Mango Avocado Spinach Salad - Serves 8

2 large mangos
2 avocados
A few handfuls of baby spinach.
A couple of dashes of balsamic vinaigrette dressing.

Peel mangos and slice the cheeks around the pit.  Slice thinly.
Peel avocado.  Remove pit and slice about the same width as mango.
Wash spinach and add as much as you like.
Drizzle and toss salad with prepared balsamic vinaigrette dressing right before serving.


Happy Memorial Day!

Caribbean Chicken, Basmati Rice and Mango Avocado Spinach Salad


Friday, May 27, 2011

Refreshing Thai Cucumber Salad


Tamarind Juice
Featured Ingredient: Tamarind Juice

Last weekend the cuisine of choice was Thai.  Grilled Lemongrass Pork Tenderloin, Bok Choy, Basmati Rice and a Refreshing Cucumber Salad.  Of all these, I thought the Cucumber Salad had the best blend of flavors.  After it was portioned out, my husband asks me "Did you take a picture?"  In the rush of putting all the elements of dinner together, it completely didn't occur to me that I used a canned ingredient. I even served it in one of the dishes I use for my photos.

In my defense, I normally don't put recipes on my site if the item hasn't been tested or came out well. Sometimes it's frustrating when I take pictures throughout the prep and find the final product is average at best. I hadn't tried this salad before, so I didn't know this Thai-inspired vinaigrette would be a perfect blend of sweet, sour, salty, spicy with a bright crunch. Next time I make it I will add the finished photo. 

OK, while this recipe fits well with Time Saving... Tamarind Juice is not the most run of the mill ingredient.  However, if you live in or near a metropolitan area, this can be found rather easily in International Markets, or even in a large chain like a Stop & Shop in more ethnically diverse communities.

Tamarind has sweet and sour taste and there is no clear cut substitute.  I found some sites on the web that recommend how you can reach a similar taste profile.  But I haven't tried them, so I don't feel comfortable endorsing them.

This recipe is borrowed from All Recipes.  I thought it was so perfect in flavor, it didn't need any modifications. I ended up using Honey Roasted Peanuts, because as I was making dinner I realized we didn't have any peanuts.  So I sent my son out to get some.  Even though he called me on his phone to confirm what I asked for he still brought home the wrong thing.  Maybe he has a secret culinary talent, because they actually worked really well with the other ingredients. 

Never trust a 14 year old boy with his head in the clouds to do your grocery shopping.  But as he loves food like I do, he is one of my best critics.


Refreshing Thai Cucumber Salad
Serves 4

1/2 cup tamarind juice
2 tablespoons chopped fresh cilantro
2 tablespoons chopped peanuts
2 tablespoons rice vinegar
1 tablespoon brown sugar
2 teaspoons fish sauce
1-1/2 teaspoons red pepper flakes
2 teaspoons toasted Asian sesame oil
1-1/2 teaspoons minced fresh ginger root
2 cucumber, thinly sliced

Mix all ingredients in a large bowl.  Slice 2 English cucumbers in half lengthwise then cut the slices cross-wise. Add cucumber and coat with vinaigrette.  Cover and let sit in the fridge for 10 minutes before serving.

This is perfect summer side for grilled meats.

Sunday, May 22, 2011

Twice Tested Time-Crunch Turkey Meatballs

Can Do Cooking:  Turkey Meatballs - Made with Ground Turkey Breast.  Yes you can make this taste good!

Will it stop raining already?  I thought it was supposed to be April Showers = May Flowers.  Anyway, I have a love hate relationship with this time of year.  While hooray the weather is warmer, and everything is blooming, this means a fresh new crop of chores (pun intended).  
The part of spring I love


Beautiful Lilac has such a short window for beauty
Winter means only inside responsibilities, except for snow removal.  The warmer months mean planting, weeding, feeding,  mowing lawns, fending off insects and a bevy of other things besides indoor maintenance.  It's when construction starts, perhaps painting and spring cleaning.

With twice the work, you need to be as efficient as possible with your time. Quick prep meals are key.

One Sunday my husband brought home ground turkey breast. I've cooked in the past with Ground Turkey with some success.  But  ground turkey breast?  Low fat, and similar looking to ground chicken, it didn't really hold high hopes for something YUMMY.  My husband is not even a fan of ground turkey. He actually bought it on my behalf as he thought I would enjoy something bland and chewy. 

It had been a busy day, and I wasn't in the mood for "catering service."   In my house that means multiple meals to make everyone happy. Maybe I could turn it into make-shift spaghetti and meatballs and sell it my husband as well as my kids.  My youngest is very aware when I substitute a different type of meat, so it wouldn't be easy.

The Plan:

My inspiration was a recipe I had seen once for Seitan. If you have ever made or had Seitan, you know it's created by mixing water and vital gluten flour and is a vegetarian's meat.  As you can imagine the end result tastes like nothing. That said, it will take on any flavor you put into it.  Since beef is traditional in spaghetti and meatballs, my goal was to assimilate beef like characteristics into the turkey, which also has little flavor.  I had seen a recipe for "beef flavored" seitan.  The key ingredients were tamari and worcestershire sauce.... I thought, if I add this to turkey mixture maybe I can boost the flavor and make it less turkey-like. Indeed it was recipe for success.

Turkey Meatballs

Extra Virgin Olive Oil as needed
3 cloves garlic mashed into a paste or minced
1 lb. ground turkey breast

3 slices soft italian loaf bread
1/4 cup milk to moisten
1 egg beaten
1/4 small onion chopped
1/4 cup parmesan cheese (the finely grated kind)
black pepper to taste
1/2 tsp salt
5 to 7 dashes tamari
6 to 8 dashes worcestershire sauce
1/8 tsp allspice
Handful of italian parsley chopped
24 oz.  prepared jarred sauce.  Plus part of another jar for saucing your pasta.  I had best results with Prego Tomato Basil Garlic.

Chop garlic. Add a little salt and a little olive oil to your board and continue mincing. The oil and salt helps the garlic stay in one place. Scrape garlic with the back of a chef's knife to make something close to a paste.  (If you have a garlic mincer save yourself the trouble and run the garlic through there).

Combine the garlic and the rest of the ingredients in a large bowl. 

Run your hands under a slow stream of water to moisten them.  Shape meatballs into about 1  to 1 1/2 inch balls.   You may need to wet your hands from time to time.

Heat 1 tbsp oil in a heavy skillet over medium low heat.  Carefully drop meatballs into skillet in a clockwise direction.  (They are too fragile to drop in all at once, and this way you can keep track of which one has been in the longest and so on).  Cook meatballs on one side until a light crust forms and the meatballs don't stick as easily to the bottom of the skillet.  Turn them over with a fish spatula or delicate tool.

Pour a 24 oz. jar of desired jarred pasta sauce. NOTE: that is enough sauce to cook the meatballs but not enough for your pasta.  Heat up some more sauce for your pasta.

Turn up heat to a boil and watch just until pasta sauce starts to just bubble then turn down to simmer.  Make sure to cover quickly or you will have a big mess.

Simmer until meatballs are cooked through to 170F.  Cooking times will vary depending on how long you cooked them prior to adding sauce and what size they are.  Check after 10 minutes. Remove from heat and let sit for 5 minutes.    
These are also great in a meatball sub with melted mozzarella cheese.


Twice Tested Turkey Meatballs

Sunday, May 15, 2011

Chocolate Lace Sandwich Cookies


Quaker Oats
Featured Ingredient:  Old Fashioned Rolled Oats

Last night I had the rare pleasure of going out to dinner with my husband.  My oldest son is now 14 years old and I figured he would be willing and able watch his 10 year old brother for a couple of hours (at least for money).   After dinner my husband and I went to Home Goods to look for some bargains. For those of you who don't have Home Goods it is a discount store that's part of the TJ Maxx family which sells, as you might expect, all sorts of housewares.

While perusing the cooking and appliance section (big surprise) I came across a giant cookbook by bon appetit dedicated specifically to desserts.  Nearly 700 pages of anything and everything decadent from cakes to cookies, custards to candy.  200 recipes alone of something with chocolate in it. At $22 that was a no-brainer. You can also get a full year subscription to the magazine by buying the book (offer expires 5/31/11) so I got it just in time.

One of my goals for Sunday, besides adding a blog post, was to break in the cookbook.  I came upon a recipe for Lace Cookies with Chocolate filling.  When I was a little girl, my parents used to go Jutland Bakery in Darien, CT on Sunday mornings after church.   I would always ask for chocolate lace cookies.  That bakery is no longer there but my fondness for lace cookies with chocolate lives on.  Since it was Sunday, the recipe seemed appropriate. This is a cookie, I never made before.  It was actually quite easy.  The key is to have at least two racks and a decent size work area where to cool your cookies and then place them on paper towels to absorb any excess butter.

The recipe calls for 2 teaspoons orange zest.  I thought these were yummy but ended up with a little too much of an orange note for me.  I might cut back to 1 teaspoon and replace the other teaspoon with vanilla extract next time.

Chocolate Lace Sandwich Cookies - Makes 20 cookies

1 cup (packed) light brown sugar
2/3 cup old-fashioned oats (not quick cooking)
1/2 cup unbleached all purpose flour
1/2 cup sliced almonds
2 teaspoons finely grated orange zest (from 1 large orange)
1/2 tsp baking powder
1/4 tsp salt
1/2 cup (1 stick) unsalted, butter melted
1/4 cup whole milk
4 oz Ghiradelli bittersweet or seminsweet chocolate, chopped

Position rack in top third of oven and preheat oven to 350F.

Line a heavy rimless cookie sheet with a silpat or foil.  (I used foil).  Stir together brown sugar, oats, flour, orange zest, baking powder and salt.
Add melted butter and milk and stir well.  Let batter stand for 15 minutes.

The recipe book said 10 but I found with each batch, as the batter sat longer the baked cookies were less spread out and more uniform.

Drop batter by rounded teaspoonfuls onto cookie sheets, space at least two inches apart.  (You will be surprised that 1 teaspoon makes such a large cookie.  They are twice the size you would see in a bakery.)

Bake for 9 to 10 minutes until cookies are bubbly and golden brown.  Remove from oven. NOTE: the cookies will be very soft and will fall apart if you try to move them individually at this time - they will harden and stick together as they cool).  Carefully slide baking mat or foil with from cookie sheet with cookies on it onto a rack to cool.  Once cooled remove cookies with a small offset spatula by sliding it under them and then transfer to paper towels to absorb any excess butter.   Use clean foil or mat for each batch.

Lace cookies out of the oven

Marry up matching size cookies and line a baking sheet with foil.  Melt chocolate in double boiler.  Spread a little bit of chocolate on the bottom side of one cookie.  Press a similar size cookie on top and place on cookie sheet.

Repeat with other cookies.  Once completed place cookie sheets in refrigerator to cool and solidify chocolate.  

Enjoy your piece of crispy chocolate heaven.

Chocolate Lace Sandwich Cookies
This post is linked to: Make Ahead Meals for Busy Moms

Saturday, May 7, 2011

Dinner after a Day at the Bronx Zoo - Chicken Enchilada Suizas

Green Chiles
Featured Ingredient: Green Chiles

Yesterday, I went with my child's 4th grade class on a trip to the Bronx Zoo.  It was the culmination of their Endangered Species project where they got to see up close (or as close as safety permits) some of the animals they learned about and grew to love over the last couple of months. It couldn't have been a more beautiful day to experience that.  Once you got into the zoo, you were free to roam about, I didn't really have to chaperone any other kids, so it was a nice opportunity to spend time with youngest son.  As I also love animals and wildlife, signing up for this trip was a no-brainer.

We got to the zoo about 10:30 a.m. (after sitting in traffic for two hours) and had until 3:00 p.m. before we were travel back in the same two hour traffic.   Needless to say I got my exercise, going from one side to the other, trying to hit every exhibit.  When we returned back to school,  I felt like this:

I was pretty exhausted, but still had to get dinner on the table.  In this situation I tend to lean towards easy Mexican dishes.  With some pre-cooked ingredients you can create a quick and satisfying family meal in a relatively short amount of time without too much effort.

One of my favorites in Enchiladas Suizas.  While the "suiza" really refers to Swiss cheese, I prefer Monterey Jack.  If you are not a fan of burn-your-throat spicy but like flavor, this is great meal. Serve this with one of the Goya Rice Mixes and maybe "Mexicorn" in a can... and you are "bueno a ir" (good to go).

Enchilada Suizas - Serves 4 to 5

3 cups shredded or chopped cooked chicken
2 jars (8 oz. each) Ortega Green Taco Sauce (Mild) - Made with Green Tomatoes and Tomatillos
2 1/4 cups grated Monterey Jack Cheese
1 4 oz. can chopped mild green chiles
1/8 cup chopped cilantro (chopped cilantro should equal scant 1/8 cup)
1/2 tsp ground cumin
1 package flour tortillas 10 count (6 inch diameter)
Scant 1 cup sour cream
2 to 3 scallions for topping/garnish

Preheat oven to 375F

In a large bowl combine chicken 1/4 cup taco/tomatillo sauce, 3/4 cup shredded cheese, cilantro, cumin and green chiles.

Mix sour cream and taco/tomatillo sauce in about equal parts.  Scant 1 cup sour cream to 1 cup taco sauce.

Wrap tortillas in damp paper towels and microwave for 1 minute to make more pliable.

This would be a great stopping point to put on the Goya rice mix, as it takes 25 to 30 minutes, so each dinner element finishes at about the same time.

Spread about 1/2 cup sour cream/taco sauce mixture on the bottom of a 9" X 13" in baking pan. 

Add about 1/3 cup of chicken mixture in the middle of the tortilla.  Fold top and bottom portion of tortilla toward center.  Roll in left and right side, being sure that top portions are tucked in.  Place seam side down. Repeat with other tortillas.  Sprinkle with remaining cheese and sprinkle with scallions.


Bake in a 375F oven for 20 minutes until bubbly and heated through.  To add additional color you can broil for additional 2 minutes or so until desired color. 

Now your rice should be done and if you opted for frozen vegetables you probably put these on somewhere after the enchiladas were baking.
Enchilada Suizas Deliciosas
Una buena cena para su familia! (Mr. Forte your teaching is not lost on me some 30 years later... God Rest Your Soul!)


Wednesday, May 4, 2011

Vegetable Lasagna with Parmesan Bechamel Sauce - Take Two

Featured Ingredient: Ricotta Cheese

In sunny 60 degree weather, what do you serve?  It's too high up on a thermometer for a heart-warming stew.  It's hardly the dog days of summer when something grilled with a side of fresh salsa is in order. I think this is the perfect territory, for something fresh, yet filling and cheesy -- like a vegetable lasagna. A great way to take advantage of spring's fresh bounty of produce appearing in your supermarket, at more affordable prices.  The most prominent right now is Asparagus.  Nothing says spring more than those long slender stalks that my son used to call "trees."

I'll admit this is not a time-saving recipe.  But it's worth the work.  You can think of it as saving time during the week, as you can make a big batch in 9" X 13" pan and reheat portions the next couple of nights, depending on the size of your family.   You can also reduce prep time as I did in this recipe with no boil lasagna noodles.  The lasagna is layered with a mix of asparagus, broccoli (mostly florets), fresh spinach and shredded carrots along 3 cheeses (parmesan, ricotta and mozzarella) along with a creamy flavor infused bechamel sauce.  I thought it would be too heavy, but because the vegetables are so light, it actually works well.
I'm calling this take two as the last time I attempted it using a different strategy, but the same basic recipe, my lasagna was lacking height and bulk and ended up on the watery side.  Fortunately this version is not dry, nor do you have to worry about floating pasta... well maybe not exactly floating but wading?

Key things ensure your vegetable lasagna does not come out watery whether you use boil or no boil noodles.

1. After you saute your vegetables let them drain off any excess moisture.

2.  If using no boil noodles, don't let them sit in water to be a bit more pliable.  (Except for maybe the top layer pieces, as they are not weighted down with as much liquid and moisture as the middle and bottom layer of pasta.) You end up having more than enough moisture in this recipe so use them dry as it gives them something to soak up. 

3.  Add an egg to your ricotta. In baking, eggs are used to set liquids, batters etc.  So it doesn't hurt to have them add a little bit of their protein to help the cause. (Plus it seems to make the ricotta fluffier).

Vegetable Lasagna with Bechamel

Sachet D'Epice
1/4 small onion
1 bay leaf
10 black peppercorns
Cheesecloth and Butcher String

Make a sachet d'epice.  I learned this in culinary school.  Wrap a quarter of an onion, a bay leaf and about 10 peppercorns into cheesecloth and tie with butcher string. This helps infuse the onion flavor into your bechamel sauce, while keeping it silky and free of little bits of onion.

Sachet d'epice


Parmesan Bechamel Sauce
5 tbsp butter
4 tbsp flour
4 cups milk
1 tsp salt
1/8 tsp ground fresh nutmeg
1/4 cup finely grated parmesan cheese

Preheat oven to 375F
Melt butter into a large saucepan over medium heat and whisk in flour to form a loose roux. Stirring very frequently let this bubble for a couple of minutes or until it reaches a golden color. 
Whisk in milk slowly for the first cup then add the rest.  Attach your sachet to the pan handle and dip into pan. Add salt. Continue whisking until milk comes up to temperature and mixture begins to thicken.  Stir in nutmeg and parmesan cheese.  Remove from heat and keep warm.

Parmesan Bechamel


Vegetable Lasagna
9 no boil noodles
Extra virgin olive oil as needed
4 cloves garlic minced
10 oz fresh baby spinach (I used one 5 oz. box and the spinach literally disappeared as it cooked down)
One large bunch fresh broccoli (I mostly used the florets and the top portion)
2 cups shredded carrots
20 large asparagus spears
(Bottom line is you are looking for at least 6 to 7 cups of cooked vegetables)
32 oz. Part Skim Ricotta cheese (most of the container)
1 beaten egg
1 block grated Part Skim Mozzarella cheese (like Polly-O) not the fresh kind remember too much water content
Grated Parmesan cheese as needed
Salt and Pepper as needed
Fresh Parsley for garnish

Heat 1 tbsp olive oil in a large skillet.  Add spinach.  Saute one minute and 2 cloves garlic, salt and pepper.  Cover and steam/saute until bright green and wilted.  Remove to a colander over a large bowl and let drain.

Add more olive oil if needed and add broccoli, asparagus and carrots.  Saute one minute to release moisture and add 2 cloves garlic, salt and pepper.  Like the spinach cover and steam/saute until vegetables are still bright and crisp tender.   Remove to colander with spinach to drain.

Mix ricotta (nearly the entire container) with egg.

Begin assembly. Lightlhy cover the bottom of the pan with bechamel sauce.  Add three no boil noodles going across, spread apart evenly.  Lightly spread a good amount of ricotta cheese on the pasta, top with heaping spoonfuls of the vegetable mixture cover with bechamel sauce.  Then sprinkle with mozzarella cheese.
Add another layer of pasta and repeat.
Add final layer of pasta. If you soaked these in hot water for a few minutes.  Pat them dry before you add to the pan. Pour over bechamel sauce and top with mozzarella and parmesan cheese.


Tightly cover the sides with tin foil, but carefully tent the top as to not have the cheese stick to the foil.  Bake for about 40 minutes.  Remove foil and let bake an additional 10 minutes until bubbly.   If it still doesn't have that nice golden color.  Broil for a couple minutes until desired color.

Let rest on a rack for 15 minutes.

As with all lasagnas, it will taste better and come out the pan better the next day.  Hey it may have been hard work, but you don't have to worry about dinner tomorrow.
Vegetable Lasagna with Parmesan Bechamel Sauce